 SDM Documentation
Standard Mode
Step 1: Select Data Source
Choose where your data comes from
Step 1: Select Data Source
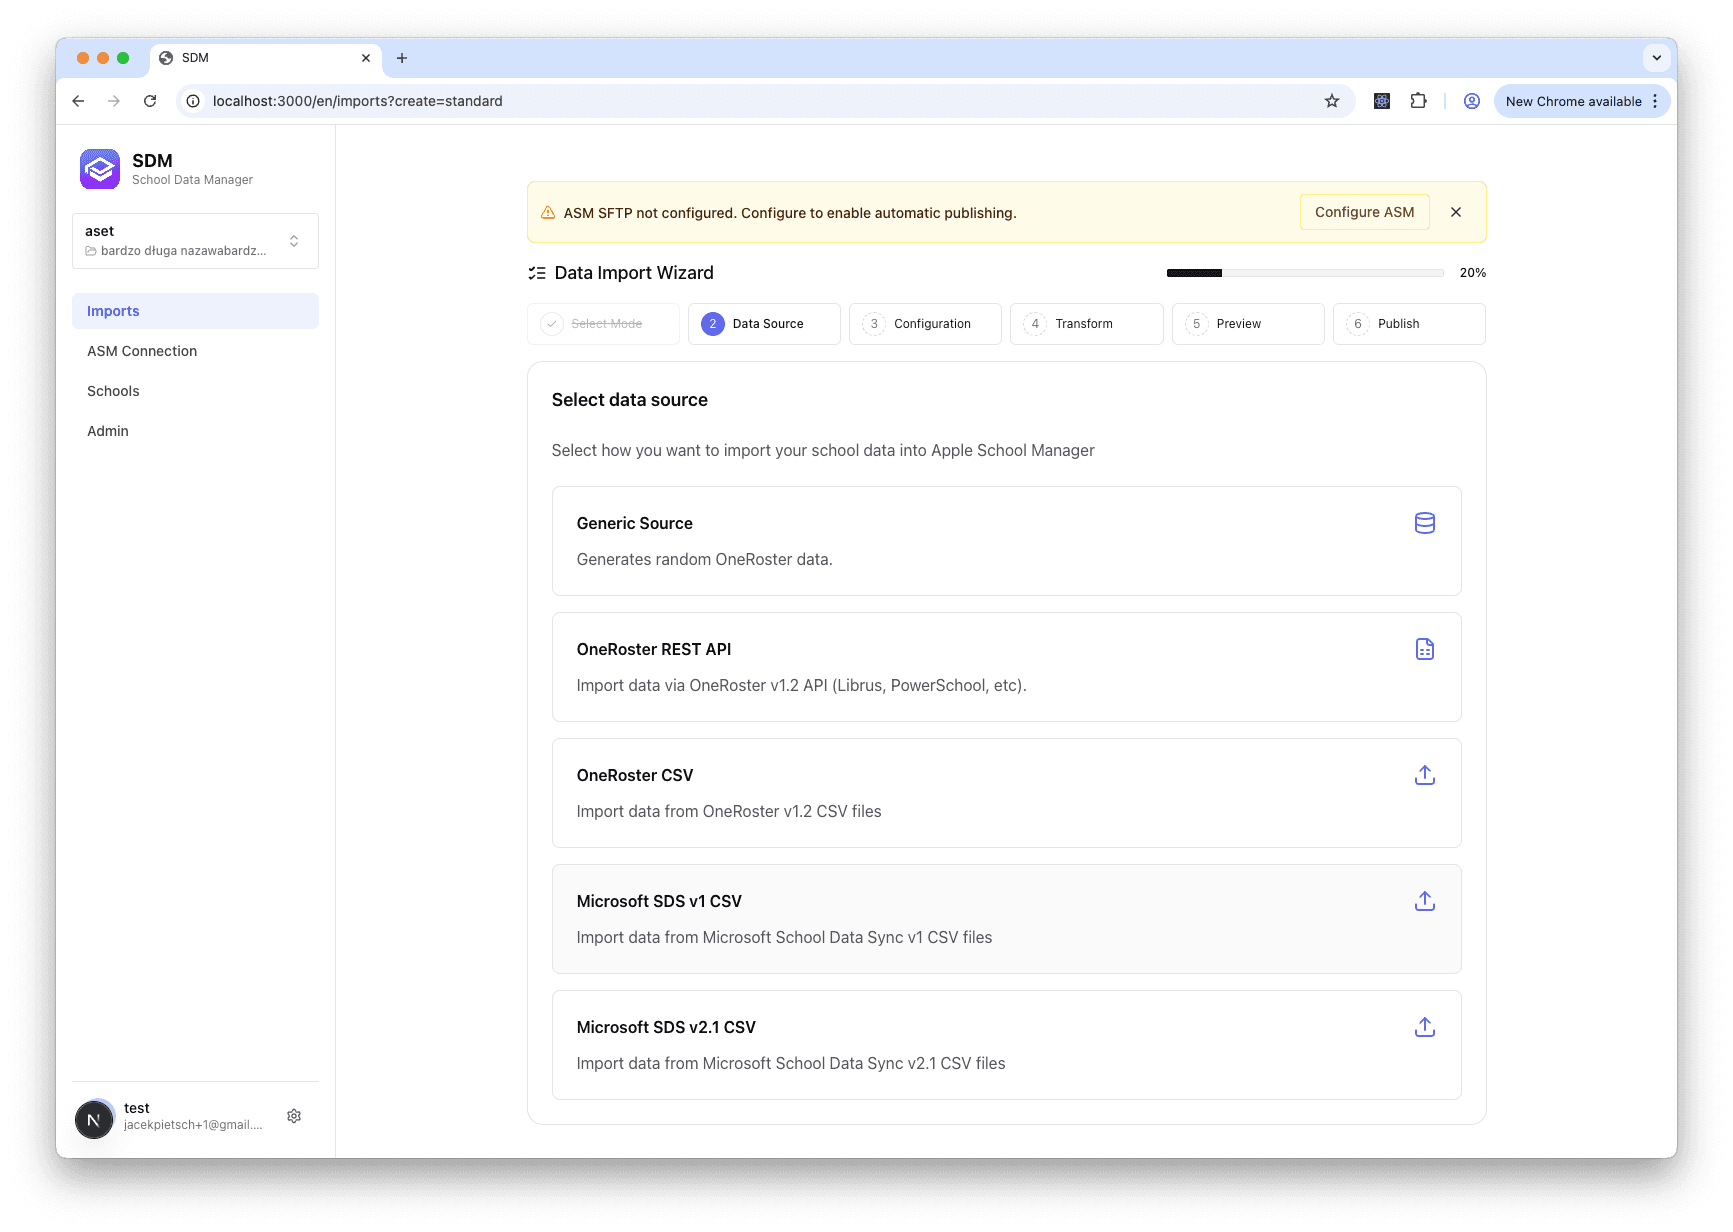
The first step in creating a flow is selecting your data source.
Available Data Sources
OneRoster REST API
Connect directly to a OneRoster-compatible Student Information System.
- Best for: Live data synchronization
- Requirements: API credentials from your SIS
OneRoster CSV Files
Upload CSV files exported from your SIS in OneRoster v1.2 format.
- Best for: Batch imports, systems without API access
- Files needed: users.csv, classes.csv, courses.csv, orgs.csv, enrollments.csv
Microsoft SDS v1
Import from Microsoft School Data Sync version 1 format.
- Files needed: school.csv, student.csv, teacher.csv, section.csv, studentenrollment.csv, teacherroster.csv
Microsoft SDS v2.1
Import from Microsoft School Data Sync version 2.1 format.
- Files needed: orgs.csv, users.csv, roles.csv, classes.csv, enrollments.csv, courses.csv
Test Data (Generic)
Generate sample data for testing and demonstration purposes.
- Best for: Learning SDM, testing ASM connection
How to Select a Source
- Review the available sources shown as cards
- Click on the source that matches your data
- The wizard advances to the configuration step
Learn More About Data Sources
For detailed configuration options, see the plugin documentation:
What's Next
After selecting a source, you'll configure it in Step 2: Configuration.